My s.com
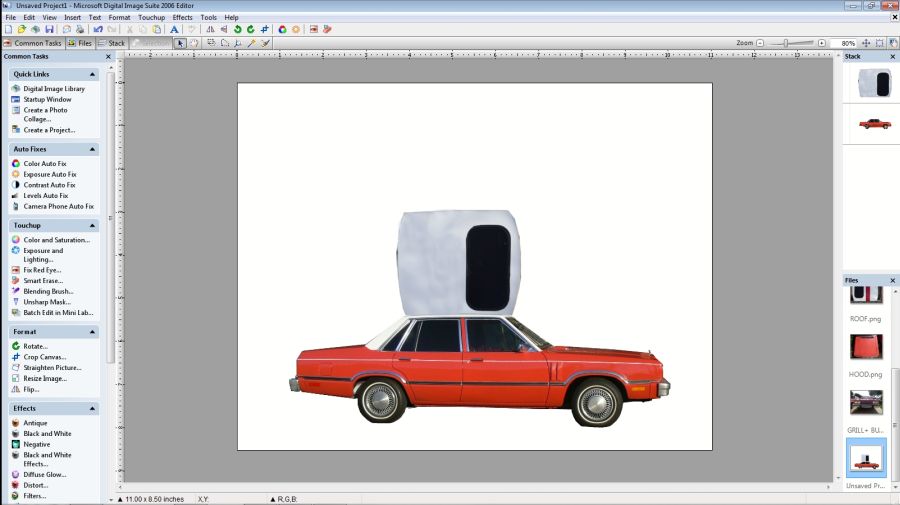

Figure D
Figure C
Click Image To Enlarge
*WHEN MAKING ADJUSTMENTS TO THE SIZE OF A PIECE
DO IT PROPORTIONATELY.(L+W)
*SAVE PROJECT AFTER EACH STEP OR MAJOR CHANGE.
DO IT PROPORTIONATELY.(L+W)
*SAVE PROJECT AFTER EACH STEP OR MAJOR CHANGE.
Now add one of the sides. (Figure C) Adjust the length to be about 1" from the width of the area both front and back. Now line the roof up with the top and adjust to fit where the roof area goes. Add the other side and adjust the length.
Next add the glass, hood and trunk. Adjust all to fit.
Now I don't know why but I had to make my hood and trunk longer by about 1/4".
I think I made the car too skinny.
You can adjust this if needed after you try a test print.
Now add the grill, top bumper, and front bumper, then the rear taillights, top of bumper, and rear bumper. Adjust all to fit. I had to make my front and rear bumpers taller.
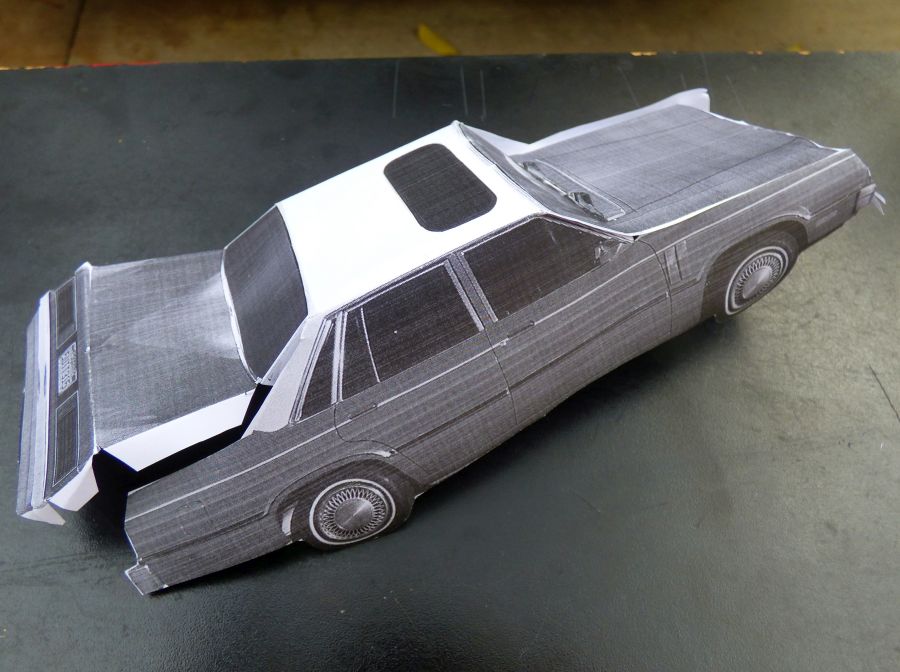
You can see in this test, the rear glass is too short and the hood is too short .
Group the project pieces together, and size the whole thing to fit the page.
Print a black and white test sheet on regular paper. Cut it out with sissors and fold it up and see how the pieces fit. Take note of what if anything needs adjusting.
Go back to your photo program and ungroup the project and adjust if necessary. Make sure to center it on the page to leave room for the large tabs that will be folded underneath.
Make more test sheets and repeat adjustments until you think it is ready for a final print. It took me several attemps until I got mine where I wanted it. And after the first final print, I found it still was not right. Now after making the one you see in the pictures, I see more adjustments are necessary.
When you have it to where you want it, it is time to add the fastening tabs. You can do this by adding lines to be printed out with the project, or add them by hand after printing it out. Remember to make a large tab on each side of the bottom to be folded underneath.
Print your final copy in borderless mode in color. (Figure D)
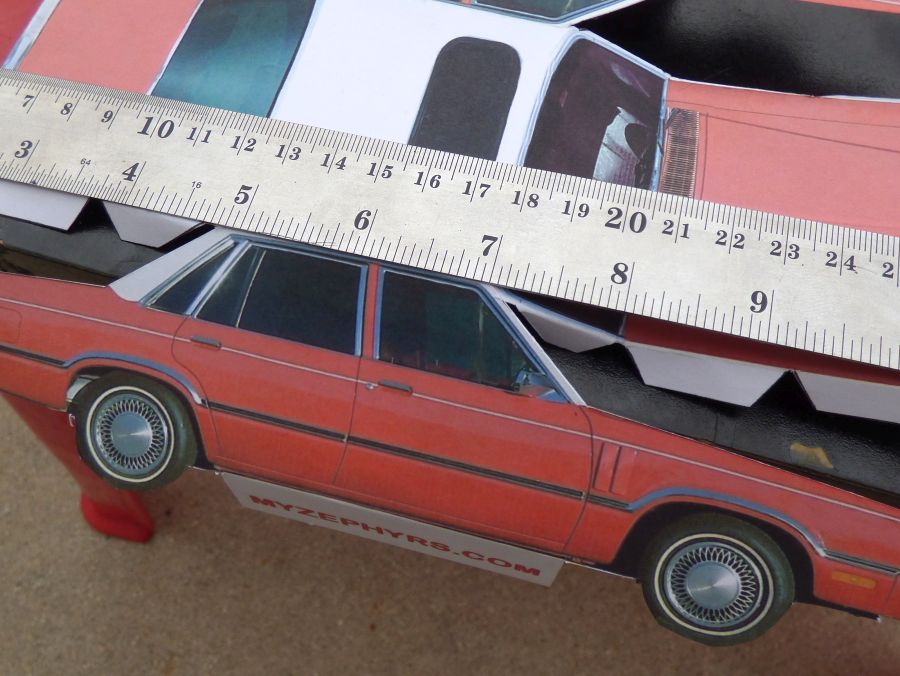
Figure F
Figure E
Click Image To Enlarge
Cut out the project using a very sharp knife on a solid cutting board. Use a straight edge for the straight lines. Make sure to cut close enough to the edge so that no white edges will show in the finished project. (Figure E)
Time to fold it up. I started on the center worked my way out. Roof, hood, grill, bumper top, bumper front. Then the back and then the roof and side glue tabs. To aid in folding, I put a straight edge on line of where the fold will be and bent it over the edge of the cutting board. It does not matter which way the fold will be at the end, just make it sharp and crisp. (Figure F)
Time to fold it up. I started on the center worked my way out. Roof, hood, grill, bumper top, bumper front. Then the back and then the roof and side glue tabs. To aid in folding, I put a straight edge on line of where the fold will be and bent it over the edge of the cutting board. It does not matter which way the fold will be at the end, just make it sharp and crisp. (Figure F)


